Reloading Ammo for Beginners: Tools, Tips, and Techniques for Getting Started

Reduce, reuse, recycle… bullets?
Well, not technically bullets, but reusing cartridges, you betcha! Shooters have been reloading ammunition pretty much since cartridges were invented. Although many people take up the craft as a way to save money at the range, there are plenty of other reasons to give it a try.
Learning how to reload ammunition takes a bit of time, but it’s well worth the effort. It’s a great way to save money, craft custom rounds, or simply pick up a fun new hobby that will keep you ready for anything.
This guide on reloading ammo for beginners will cover everything you need to know to get started. From the benefits of loading your own rounds to the equipment you’ll need, by the end, you’ll be ready to transform a corner of your house into a full-blown reloading station.
But first, a quick disclaimer. This article is for educational and informational purposes only. As with anything related to firearms, reloading ammo can be dangerous, and you should always consult an official reloading handbook or a professional before trying it. Now, back to the fun stuff!
Reloading vs Handloading: What’s the Difference?
When it comes to the art of making your own ammunition, there are two common terms you’ll hear tossed around: reloading and handloading. And while they sound similar (and to be fair, they are) there are some significant differences between the terms that are worth noting.
Reloading specifically refers to the process of taking previously fired casings and recycling them by adding new bullets, primers, and gunpowder so they can be reused. Hence the term “re-loading.”
So, what is handloading ammo then?
Technically speaking, handloading is an umbrella term that encompasses all hand ammunition loading, including reloading used cartridges. That being said, it is more commonly used to describe the art of crafting brand-new rounds using all new components rather than reusing any part of the cartridge.
So, while all reloading is handloading, not all handloading is reloading. Got it?
Long-time shooting enthusiast and seasoned handloading hobbyist John Shoup, who has spent decades fine-tuning his craft, breaks down the difference between the two terms.
“People are notoriously leaving brass everywhere. So if I go pick some of that up and I just manufacture it into some plinking ammo, that's reloading,” he explained. “But if I'm trying to buy a bunch of new brass, or even used brass, with the same lot number and try to make all exact clones of each round, that's handloading. It's different, you're trying to be precise about it. The stuff you buy is just inferior to what I can make. And when I think about it that way, I don't think of it as reloading. I think of it as handloading.”
Now that we’ve got that straightened out, let’s talk about some of the reasons why you may want to try handloading.
Why Reload Ammo?
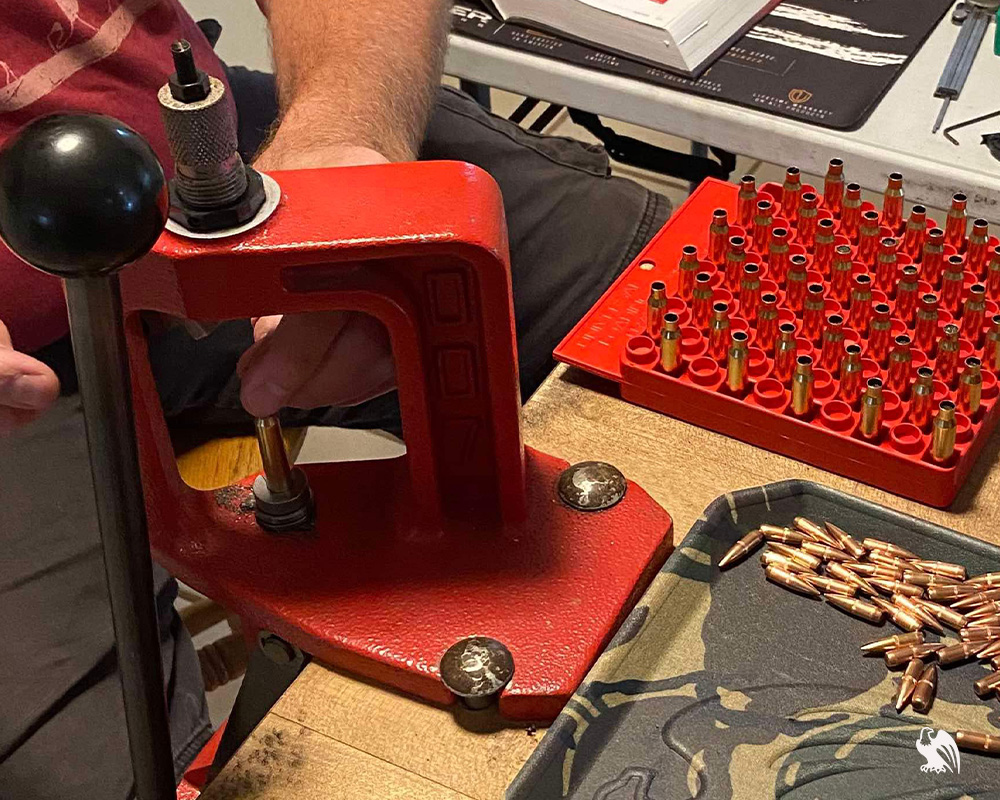
Is hand reloading worth it? Absolutely. There are numerous reasons why you may want to get into this hobby. We’ll outline the most common reasons below:
To Save Money
One of the biggest reasons most people get into ammo reloading is to save money. Ammunition, especially quality ammunition, is expensive. And if you’re training a lot, it’s pretty painful to see all those spent casings go into the trash. So, the idea of reusing those casings and cutting your ammo costs in half is understandably quite enticing.
That being said, handloading ammunition still costs money – you can’t get something for nothing. But the end result is undoubtedly worth it, especially if you take quality into consideration.
“A lot of people are like, ‘Well, it cost me X amount of money to reload. I can go buy ammunition for that price.’ And you're right, you can,” Shoup said. “You can't beat Remington Core-Lokt prices at $30 a box. But what you're manufacturing is like Nosler Trophy Grade, $60-a-box stuff. So for the same price as basic hunting ammo, you can make top-of-the-line ammo.”
Which brings us to our next point…
Customization & Accuracy
The other major reason people choose to handload ammo is because it allows them to create custom rounds. Competitive shooters, specifically, often take up handloading so they can adjust the powder charge, try different bullet seating depths, etc., until they find the perfect, most accurate round for their specific firearm. Then, they can recreate that exact, precise round of ammo so that it’s consistent every time. There’s a whole science to it.
But aren’t cartridges that come from a manufacturer consistent enough? Why bother spending the time to make your own ammo when Winchester has a whole factory and system in place?
The truth is,most factory ammunition isn’t as precise as you would assume.
“I've done some experimentation,” Shoup said. “I've specked out factory ammo. I’ve measured the length of them, I dumped the powder out, measured the powder charge, measured the brass, and they vary quite a bit. It's all within specification, but it's not exact. It varies more than you think it would.”
This doesn’t matter so much when it comes to reloading plinking rounds, but if you’re trying to be as accurate and consistent as possible, it’s worth the time and effort.
The other reason you may want to handload custom cartridges is if the rounds you’re looking for are no longer in production, or are really hard to find. This is more common than one might initially think, especially if you own rare or vintage firearms.
To Prepare for Anything
Do you have a stockpile of MREs and preserves? Are you the proud owner of a fully-stocked bug out bag? Are you prepared to live off the grid for an extended period of time?
If you answered “yes” to any of that, reloading is definitely for you.
We live in an unpredictable world. Part of being prepared for anything is having the ability to provide for yourself. The ability to reload your own ammo not only allows you to protect yourself, but also hunt to feed your family.
On a less intense note, we have experienced ammo shortages from time to time over the years, and having the ability to handload your own means you won’t have to stop training just because ammo has gotten hard to find.
Because It’s Fun!
Finally, handloading ammunition is fun! Not only is it a great “rainy day activity,” but once you get into the ins and outs of customizing it to your preferences, you can really play around to create a one-of-a-kind, high-quality product that’s fun to show off at the range. Handloading is easily one of the most enjoyable, productive hobbies a shooter can have.
“A lot of people don't want to get into reloading because they don't have the time or patience, and that's cool. You can do something else – it's not for everybody,” Shoup said. “But a lot of people really take a lot of pride in what they've done.”
Is Reloading Your Own Ammo Hard?
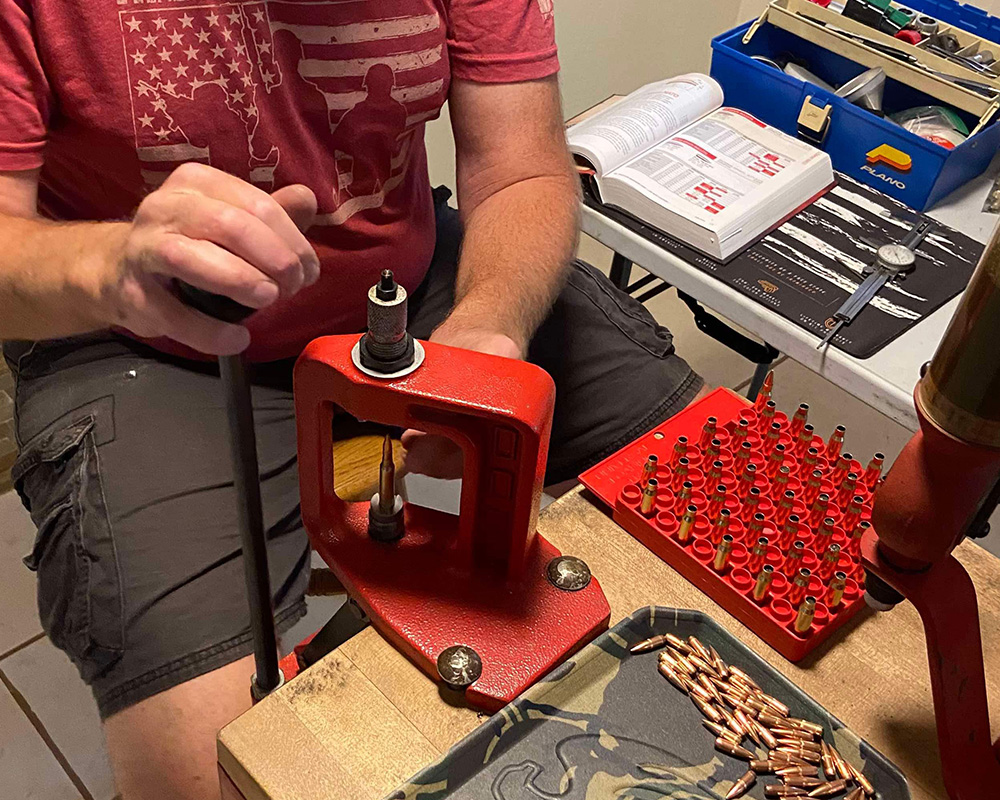
Yes and no. As with any new skill, reloading ammunition can be challenging to learn at first, since there are so many processes, terms, and tools to familiarize yourself with. That being said, the actual process of handloading is relatively simple.
The hardest part of the entire process is learning how to do it in the first place, which is where a reloading handbook comes in handy. Handloading does require attention to detail, patience, and accuracy, which can pose a challenge for some, but once you get the hang of it, it’s a pretty easy hobby to pick up.
The learning curve is definitely easier if you have someone to show you the ropes, but if you’re on your own, don’t worry. It’s still a pretty simple skill to learn so long as you’re careful to follow the instruction manual to a T.
What Do You Need to Reload Ammo?
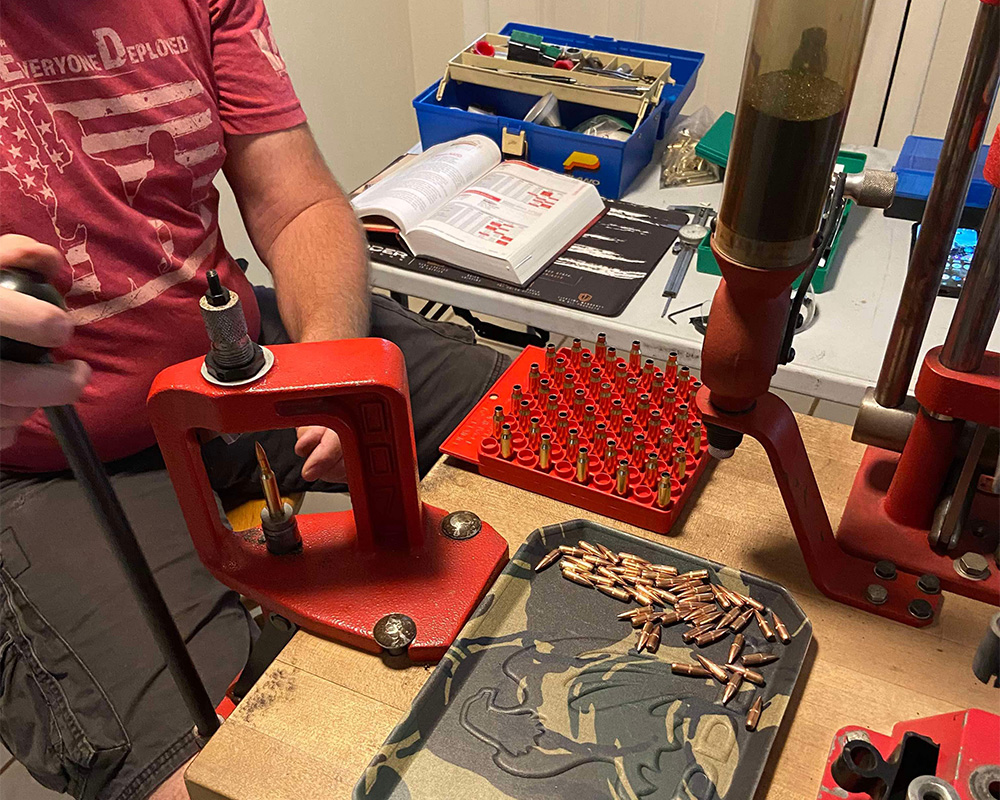
Reloading ammo isn’t something you can do with a pair of pliers and a positive attitude … It takes specialized equipment designed for the job.
But how much are we talking, here?
RCBS estimates it only takes about $300-500 to get started reloading, though you can spend a lot more depending on the equipment you choose. And there are a fair amount of tools required.
But the good news is, once you have all your major components, you shouldn’t need to replace them for a loooong time, if ever. You’ll have to keep buying things like gunpowder, primers, and bullets, of course (unless you want to cast your own bullets, but that’s for another day). Beyond that, most reloading tools are a one-time purchase.
If you want to keep things simple, you can buy a reloading kit that comes with most of the things you’ll need. Or, if you’re a little more choosy, you can build your own. Some of the best brands and sources for quality reloading products include Hornady, RCBS, Lyman, and Lee Precision. Shop around to find what fits your budget and personal preferences. The important thing is that you invest in quality tools that can get the job done right!
Here’s everything you need to get started:
Instruction Manual: The number one most important thing you’ll need to reload is a good instruction manual. These guides provide all the foundational information you need to successfully handload, including step-by-step instructions on how to assemble your ammunition. It also includes information on powder types, the powder charge you need for your specific caliber, etc. It’s an invaluable resource that you absolutely MUST have before beginning.
Reloading Press: A reloading press is the centerpiece of any reloading setup, functioning as the main tool that assembles cartridges by pressing together brass, primer, powder, and bullet. Different types of presses (single-stage, turret, or progressive) vary in complexity and efficiency, but all handle the essential steps of resizing and seating bullets.
Reloading Bench: This should go without saying, but you’ll need a space to work. A reloading bench provides a stable, dedicated workspace where reloaders can mount their press and organize their tools. You’ll want one that’s sturdy, spacious, and offers plenty of storage for components and supplies. You can buy reloading benches specifically designed for the job, or you can get a bit creative.
“I set my bench up on a toolbox, which actually works really well. It's a little bit crowded up top, but I can roll the whole thing into a closet somewhere and put it away. And then I have all the drawers on the toolbox for all my supplies,” Shoup said. “I also suggest you take some time to set up your bench in an ergonomic fashion for efficiency, comfort, and general flow of your operation.”
Tumbler/Case Cleaner: Tumblers are used to clean brass casings before reloading to remove things like powder residue, dirt, and tarnish.
Scale: This one may be obvious, but a scale is used to weigh your powder charges. The difference between a reloading scale and the one in your bathroom is that these are extremely precise, often coming down to a fraction of a grain.
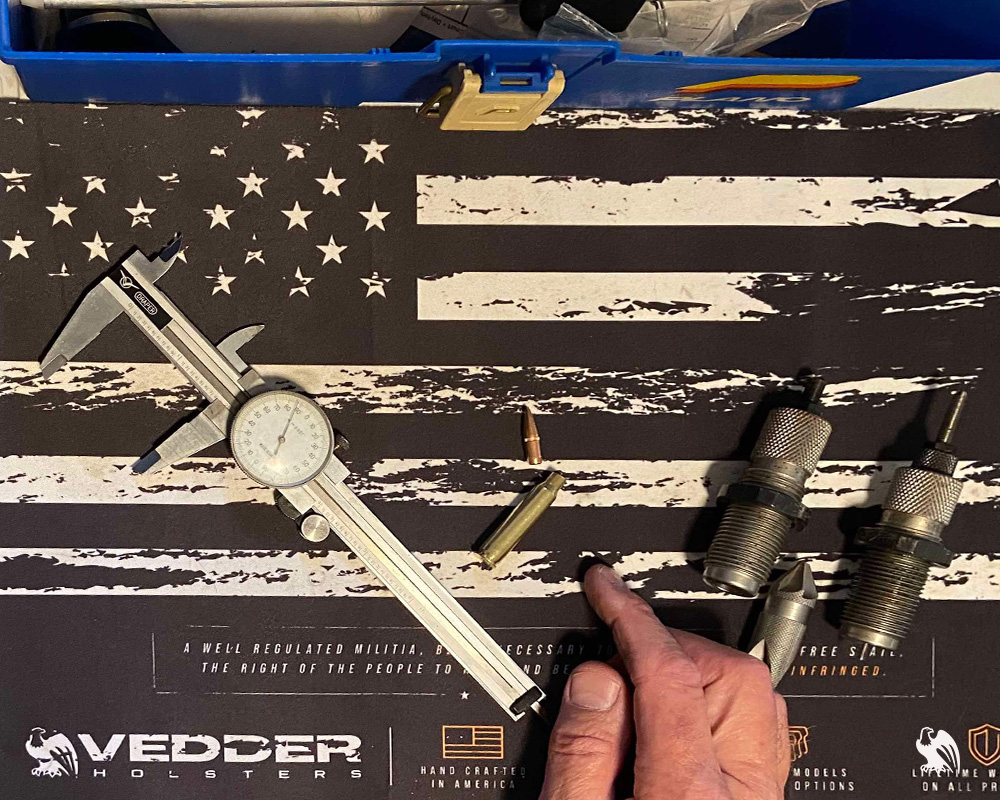
Cartridge Dies: Dies are specialized tools that are installed in your press to perform specific steps like resizing, expanding, bullet seating, and crimping. They are caliber-specific and play an essential role in ensuring that cartridges fit properly in the firearm chamber.
Primer Catcher: The primer catcher is a container that collects used primers when they’re removed from cases during the resizing step, helping to keep your workspace clean and prevent old primers from causing jams or contamination.
Hand Priming Tool: This tool is used to seat new primers into the case, offering a more controlled and tactile feel than priming on the press. Hand priming tools allow reloaders to position primers more precisely, reducing the risk of misfires or malfunctions.
Primer Brush/Pocket Cleaner: Primer brushes and primer pocket cleaners are small, specialized tools used to clean primer pockets inside the cartridge case. Although they work a bit differently, both are effective, so choose whichever you prefer to get the job done. Removing residue from previous firings helps primers seat consistently and ensures proper ignition.
Case Tray/Reloading Block: The case tray, or reloading block, holds cases upright during various stages of reloading, helping to keep them organized. It’s particularly helpful when loading large batches, preventing spills, and ensuring each case is processed properly.
Case Trimmer: A case trimmer shortens cases to the correct length after multiple reloadings, as cases can elongate with repeated firings.
Chamfer/Deburring Tool: This tool smooths the inner and outer edges of trimmed cases, making bullet seating easier and helping to prevent deformation.
Primer Tray: The primer tray is a flat, round tray that helps orient primers all facing the same way before seating, simplifying the loading process and reducing the chance of installing a primer upside-down. This tray will also help arrange the primers to keep you from touching them with your hands, as finger oil can damage them.
Case Lube/Lube Pad: Case lube reduces friction during resizing, preventing cases from getting stuck in the die. A lube pad is often used to apply a thin, even coat of lubricant on cases, especially for bottleneck cartridges.
Powder Funnel: The powder funnel ensures that all powder goes directly into the cartridge case without spilling. It’s also helpful for pouring any leftover powder back into its original container, as it shouldn’t be stored in the powder measurer.
Powder Measurer: The measurer holds your gunpowder and dispenses precise amounts of powder for each cartridge to keep all your rounds consistent.
Powder Trickler: The trickler adds powder granules to your scale one at a time, making it easier to control powder weight for consistent, accurate loads. This is a great tool to use if you’re looking for ultra-precise rounds.
Dial Caliper: Calipers measure case length, overall cartridge length, and other critical dimensions to make sure they meet safety and performance standards.
Kinetic Bullet Puller: This tool safely disassembles rounds by removing the bullet from the case, allowing reloaders to salvage components if an error is made or if adjustments are needed.
EDC Tray: One very critical yet very underrated aspect of reloading is keeping your work area clean and organized. An everyday carry tray is a compact, organized storage solution for reloading tools, ammo, and small accessories. Trust us, you’ll want one.
Cartridge Pieces: Before you can do anything, you’ll obviously need the four main components of any cartridge. Brass is the case that holds all the components together, bullets are the projectiles that are propelled when the gun is fired, primers ignite the powder, starting the combustion process, and powder is the fuel that creates the necessary pressure to drive the bullet out of the barrel. Each piece has a specific role, and together they make a complete round of ammunition.
What Kinds of Ammunition Can You Reload?
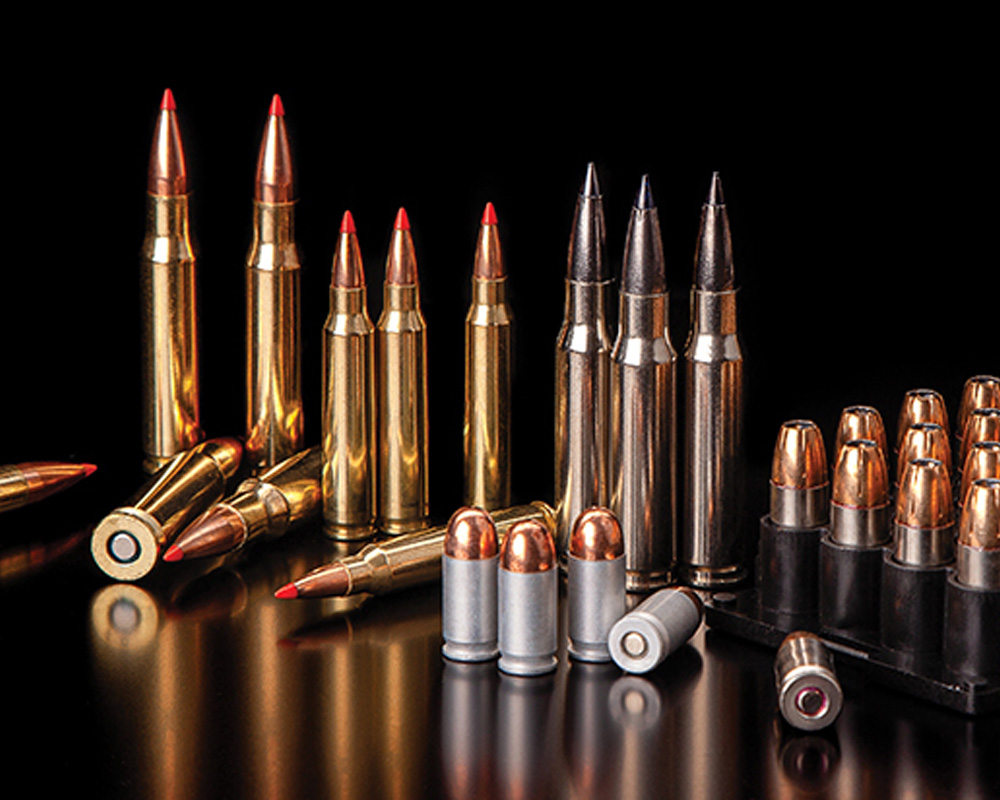
The good news is that almost any type of ammunition can be reloaded, and most cases can be reused anywhere from 5-20 times depending on the powder charge, according to RCBS.
The one exception to this is rimfire ammo. Rounds like .22 LR aren’t often reloaded,as their cases are deformed after firing, making it extremely difficult (and even somewhat dangerous) to reload. So while you technically can reload .22 rounds, it’s pretty tricky and not necessarily recommended – especially for those new to the ammo reloading game.
Other than that, you can find dies for pretty much every cartridge that has ever been made, meaning you can handload any type of ammunition your heart desires (yes, even shotgun shells).
How to Reload Ammo
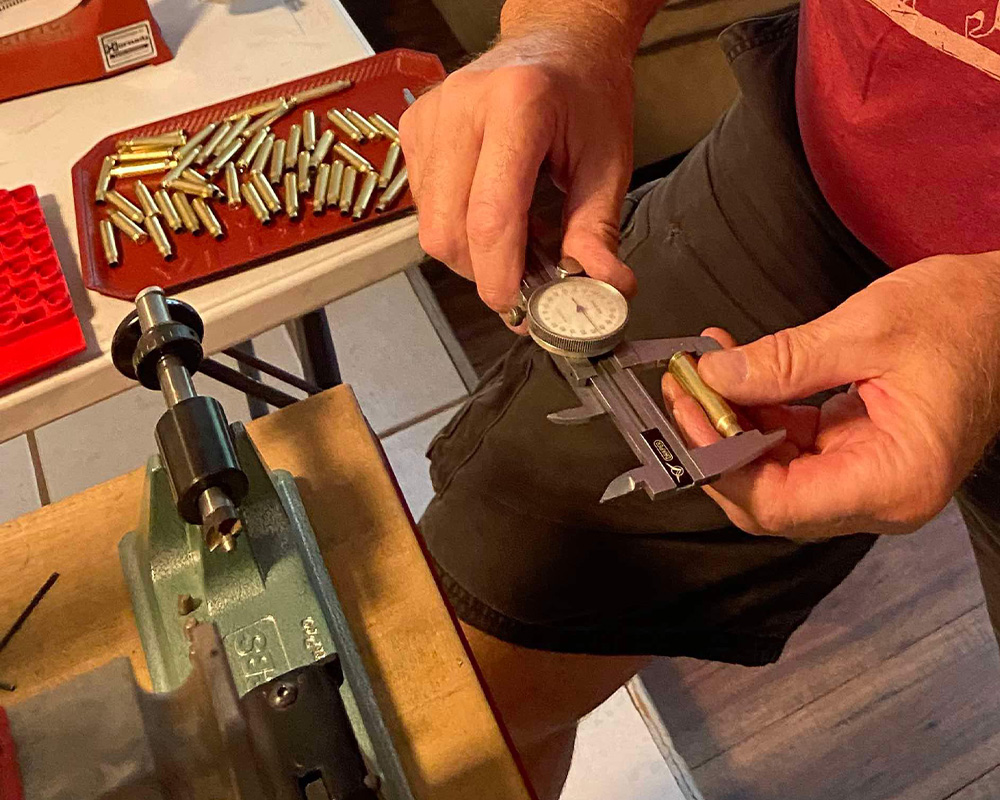
The exact process that goes into reloading ammunition depends on your specific caliber and the tools you have on hand. So while it’s always advisable to refer to your handy reloading guide for the exact process needed for what you’re doing, here is a high-level overview that covers the basics.
1. Acquire Your Brass
The first thing you need to do is decide where you’re going to source your brass casings. There are a few ways to do this. First, if you’re planning to handload some high-end rounds, you may want to purchase new casings, which is totally acceptable. Second, if you’re looking to save money and “recycle” previously fired rounds, you’ll need to collect spent casings either from your last visit to the range, or from somebody else who was too lazy to pick them up (more for you!).
2. Prep the Casings
Next, you’ll want to get your casings ready to be reloaded. The very first thing you should do is sort your brass. Visually inspect each casing to ensure they are all the same caliber and that none of them are too damaged to use (check for cracks, corrosion, etc.).
Once you’ve got everything sorted out, put your casings into a brass tumbler to polish them up and get them looking nice and shiny.
3. Resize & De-prime
The next step is to remove the primer from your brass and resize the casing so it’s ready to be reloaded. Although you can, and some people do, perform these steps separately, more often than not your press will do both of these things at once for you.
This is where your dies come in. A resizing die, which if you remember is caliber-specific, should be threaded into your press. Before you run your casings through the die, you may need to lubricate them to make sure things go smoothly, depending on the caliber and die you’re working with. There’s an exact procedure for setting up each different die, so be sure to read the instructions before you get started. Once that’s done, insert your case into the shell holder on your press. Then, lower the press handle all the way down, running your case all the way into the die. This will resize the case to the correct size and pop the primer out.
Next, it’s time to check the length of your cartridge and trim off any excess if necessary. After being fired several times, cases naturally stretch out so they’re longer than they should be. So, check the length of your casings to make sure they meet the right specs (your book will give you a minimum and maximum length for your cartridges), and if they’re a little long, use a trimmer to shorten them to the right size.
Finally, for some cartridges you will need to adjust the case mouth so that it is wide enough to hold a new bullet. If needed, this will require a separate expander die. Again, your book will tell you if the round you’re working with will need this step. If not, it’s time to move on!
4. Replace Primer
Now that you have your casings correctly sized and de-primed, it’s time to replace the primer with a new one. There are several ways to do this, depending on the tools you have.
The first way to do this is with your press. Some presses will complete this step during the resizing/de-priming phase. After pulling the handle down, which removes the primer, you would raise the handle back up to its starting position, and the press would insert a new primer. Voila! This method is super easy!
If your press doesn’t have this nifty feature, you may need to use a hand primer. To do this, simply install the correct primer plug adapter size into your hand primer, insert the case, and squeeze the handle to seat the primer. An extra step, but still pretty easy.
5. Add Powder
To determine how much powder should be added for your specific caliber, you’ll need to reference that handy reloading manual we keep talking about. Once you know how much each cartridge needs, you’ll be able to accurately measure how much you’re putting in there to make sure you don’t go over or under. Your book will give you a minimum and a maximum powder load, so just be sure to stay within those parameters to avoid any dangerous mishaps such as hang fires, over-pressurization, or a large muzzle flash.
As with most of these steps, there are multiple ways to add the powder charge to your cartridge. Start by placing your empty cases into a reloading tray to keep them all upright and steady. Fill your measurer and trickler with powder. Use the knob or lever on your measurer to dispense a near-accurate amount of powder. Weigh that powder to make sure it’s the right amount. If you’re coming up a little short, use the trickler to fine-tune it from there by dropping a granular or two of powder onto the scale at a time. Once you’ve got a precise load, use a funnel to pour the powder into a case. A modern digital powder measurer can do all of this at once, saving you a step or two!
Once you’ve measured your powder a couple of times, you’ll have a good idea of how much you need to dispense to get the right amount. And, unless you’re going for ultra-precise ammo, you can weigh the powder once every 5-10 cartridges to make sure you’re on the right track.
Next, and don’t skip this step, take a careful look at each and every one of your casings to make sure you’ve filled them all with powder and haven’t missed one, creating what’s known as a “squib load” or a “squib round.”
“There's nothing more dangerous than a squib load,” Shoup warned. “Those primers are powerful enough to where they’ll push that bullet into the rifling, so you have a bullet lodged up in your riflings now. If that happens, stop what you're doing because if you pull that trigger again after loading another round in the chamber, it will blow that gun sky high.”
So, make sure the powder looks like the correct load in every case. No exceptions. They should be consistent, not overfilled or underfilled. If one looks off for any reason, pour out the powder and start the measuring process again.
“I use a flashlight as a last check on each round to verify the powder charge,” Shoup said.
6. Seat the Bullet
Now, it’s time to seat your bullets. Thread your seater die into your reloading press. Place a case into the shell holder, put a new bullet on top of the case, and lower the handle to press the case onto the bullet. This will seat the bullet to the proper depth, and crimp the case around it to keep it in place. You’ll want to double-check to make sure the bullet was seated to the correct depth before moving on.
7. Check Your Work
Last but not least, go back through your finished cartridges and double-check each one individually to ensure they’re ready to go. You’ll want to give each a quick inspection and check to make sure they’re the right length, the bullet is seated correctly, and the primer looks good. Make sure they all look consistent, and there are no obvious deformities. Anything that looks wrong should be re-reloaded – don’t take a chance on a wonky round!
Are Handloads Reliable?
Although there are some risks involved with reloading (as with everything surrounding firearms), these rounds are generally safe and reliable to use as long as you do it correctly.
“It's not something you want to take lightly, because it is pretty serious. You can actually hurt yourself if you're not doing it right. But as long as you follow the book and follow the step-by-step instructions, it's pretty safe,” Shoup said.
The dangers involved with handloading primarily have to do with your powder charge. Not enough powder, and you could create a hang fire, a high muzzle flash, or even a squib load that doesn’t go off when you need it to. Too much powder, and you’re risking what’s known as “over-pressurization,” which could damage your firearm, or worse, cause injury to yourself or those around you. Incorrect seating depths, faulty components, a damaged casing, or poor crimping are also costly mistakes that can cause some serious issues, according to Powder Valley Outdoors.
But, don’t let these potential risks stop you from giving reloading a try. As long as you do your due diligence, follow the manual instructions, and take the process seriously, handloads are just as reliable as anything you buy from a factory.
Summary
Whether you’re looking to lower your training budget or get into a new hobby, we hope this guide on reloading ammo for beginners has inspired you to start picking up that spent brass next time you’re at the range.
Although the art of handloading does take some time to master, it’s well worth the effort it takes to learn. Not only is it a fun and unique hobby, but it can save you money and ensure the quality of the rounds you’re shooting.
Before you get started, check out the Vedder Holsters EDC Tray and Gun Cleaning Mat – both invaluable tools to have when beginning reloading. If you’re looking for a new IWB, OWB, or pocket carry holster, visit our Holsters by Gun Model page for Kydex holsters that are custom-made for your weapon of choice.
Interested in items beyond holsters? Check out our Resources Page for links to recommended products like lights, lasers, first aid, maintenance, and more, and browse our selection of apparel, and accessories at our website, vedderholsters.com.
To stay up-to-date on all the latest Vedder Holsters content and offerings, check out our blog and follow us on Facebook, Instagram, Twitter, and TikTok, or download our FREE E-book The Concealed Carry Blueprint for all the tools, tips, and tactics you’ll ever need for successful concealed carry. And be sure to visit our sister company, GeoGrit, for all your American-made minimalist wallet needs.
*This page contains affiliate links. When you purchase a product included on this list, we receive a commission at no extra cost to you.
This article is provided for informational purposes only. Any activity involving firearms and/or ammunition is potentially dangerous and could result in property damage, serious injury, disabling injury or death. All firearms must be handled in a responsible manner and in accordance with applicable law. The author disclaims any responsibility for the accuracy, misuse of, or misinterpretation of information contained in this article.
